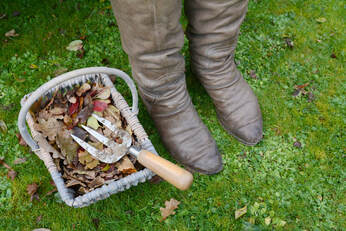
 Grab your rake to spruce up your yard after its long winter sleep. Here’s how to prep for spring lawn care. Jump start your lawn resuscitation right when the ground defrosts. You’ll will advert a muddy disaster later down the line. Not to mention the envy of your neighborhood.
Spring Lawn Care Assess the Mess When you can comfortably be outside for an extended period of time, assess your yard to see if any damage has occurred during the wintertime. Contact a York Tree Arborist if you aren’t sure what to search for. Inspect your landscape for debris, thrown branches, and dead leaves. Clear it away so you can perform a general inspection of your shrubs, garden, soil, lawn, and trees. See what grass is or isn’t growing back. Make a plan. Wake Up Grass Just as you like you, trees and grass enjoy hunkering down on dark, cold winter days. When the snow is gone, vigorously rake your grass, waking it up and encouraging it to grow. Also, rake out places of thatch. Dead, dry grass can be deep and thick. If you don't, thatch will hide sunlight and oxygen from other grass and plants. Check for mold and fungus growth. Even if your grass is a little brown, that doesn't mean it's dead. Warm season grasses green up slowly in spring. Cool season grasses green up in early spring. Don't Forget to Mow Winter is hard on numerous garden elements. Make sure your irrigation system functions correctly. Check to see if your outdoor lighting is working correctly too. Repair damaged or broken wooden structure and patio furniture. Clean your deck. Sharpen, clean, and oil your pruning shears. Tune up your trimmer and lawn mower. Prepping your yard can’t be done in one weekend. Though, if you get the heavy lifting done early, it won't be long before you have the soft, warm grass under your feet. 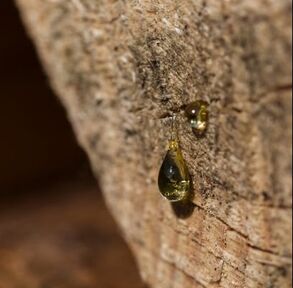 With its gooey, sticky texture, tree sap rapidly sticks to anything it comes into contact with such as automobiles, hair, skin, clothing, and more. Handling pine sap removal can be hard and a headache.
Though learning how to get rid of tree sap can be as simple as opening your cabinets. Several typical household products can work for removing tree sap. For example, one of the most popular household items for eliminating sap is rubbing alcohol. Alcohol works as a solvent, cracking, and dissolving the sap. Skin and Hair Pine Tree Sap Remover An excellent way to get sap off your skin is by using nail polish remover or an alcohol-based hand sanitizer. Just rub on the affected spots and clean with soap and water. Also, cooking oil or shortening as well as a grease-cutting dish soap will work. Getting sap in your hair is the worse. This can be taken out using peanut butter. The oils in peanut butter aid in breaking down the sap, loosening it enough to be combed out easily. Cover the areas with sap and use a warm-setting hair dryer to make it pliable. Comb out and wash your hair as usual. Mayo can be used if you are all out of peanut butter. If you use mayo, let it sit for about 10 minutes. Clothing Tree Sap Removal Tree sap can be eliminated from clothing using rubbing alcohol. Just rub onto the stained spot to get the tree sap out. Then put the clothing in the washing machine and wash using warm water. Do not put other clothing items into the washing machine. Hand sanitizer also works on getting out tree sap in clothes. Believe it or not, you can remove tree sap from clothing by using an excellent bug repellent, Spray on Deep Woods Off. This bug repellent also is good for getting tree sap off windows. Automobile Tree Sap Removal Numerous other household products can be used to remove tree sap from automobiles. Nail polish remover works wonders as a pine tree sap remover. Use with caution since nail polish remover also takes off paint. Soak a cotton ball with the nail polish remover. Rub into the affected spot and rinse with a solution of hot water and baking soda. Wash the automobile as usual. 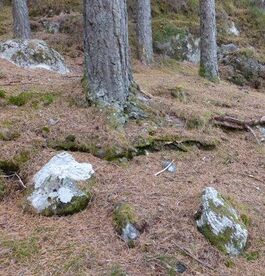 Pine needles make excellent mulch. So much so that a new creation called pine straw mulch has come out as excellent mulch for areas bared to heavy rain. It's lightweight and affordable. Instead of washing away, it unites to create a protective mat. Among the numerous mulch types, pine needles are a top choice for the residential landscape.
Benefits of Using Pine Needle Mulch There are several reasons to use pine needle or pine straw mulch. These include: Weed prevention: With mulch, a thick layer of pine needles destroys the weeds. Many weed seeds necessitate light to sprout. Mulch stops such seeds from growing. Also, it prevents wind-borne seeds from growing since it creates a barrier between the seed and soil. Water conservation: Pine needles materialize into a wide, protective mat during heavy storms. This lets moisture penetrate the pine needles but halts erosion, keeping water where it's needed close to the surface roots. Also, they lessen rainwater runoff and make a good mulch for hillsides. Enhances the soil: Pine needles break down and add organic material to the soil. Also, they aerate the soil and strengthen drainage as they crumble. Also, pine straw mulch can aid in regulating the temperature of the soil. Just maintaining the soil a couple of degrees above freezing for a couple of days longer in autumn can lengthen the growing season. Unlike bark mulches, pine needle mulch doesn’t deliver excessive minerals to the soil. Some hardwood mulches could add too much calcium and other minerals to the ground. Environmentally sound: Pine trees drop their needles yearly, creating a thick carpet on the forest ground. To grow and produce pine mulch, the needles are raked, collected, processed, and bagged. Trees don’t have to be chopped down or put through a chipper as is when making wood chips, hardwood mulch, or pine bark nuggets. Trees can continue to thrive for many years. The trees might at some point be harvested, but arborists get more years of development out of from them. Also, pine mulch breaks down slower than other mulches. So, your investment lasts longer than bark mulches or standard hardwood. 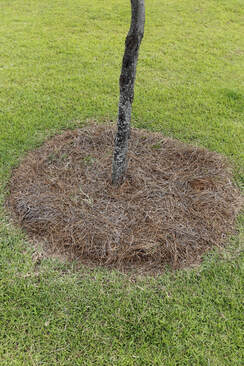 Regardless if you’re interested in starting a home-based organic business or you enjoy pine needle tea, knowing all about collecting and using pine needles is part of satisfying either objective.
There are numerous pine needle uses in an outdoor area such as mulch, weed repellent, line paths, soil stabilizer, and mild soil acidifier. Read on for some suggestions on collecting pine needles for medicinal, outdoor, or edible garden use. Pine Needle Uses Gardeners with pine trees in their yards might feel the mess from dropped needles is a headache. Though these conifer leaves are quite useful in various ways. The Many Usages of Pine Needles The needles make excellent flavoring for kinds of vinegar and teas, grill smoke to season meats, fire starters, mulch, and air fresheners. They possess numerous medicinal properties too. Collecting pine needles and processing them accurately can help you use any of these natural properties. Pine straw is frequently sold cleaned and bailed to use in an outdoor space. Care must be used when collecting pine needles to keep them free of debris and weeds. Layers of the straw mulch will aid in reducing weed growth, improve the soil, and sustain moisture. Also, they assist in improving the soil’s acidity for several plants, including holly, hydrangea, and azalea. Likewise, the scent can aid in repelling certain pests from digging in your yard. Outside of garden use, a tea created from the leaves is not only tasty, but the fumes can clear sinuses. Cooled, the tea can be used as a deodorizer and cleaner. Possessing antibacterial properties, the needles assist in fighting numerous skin diseases when used as a foot soak. These tree cast-offs are suitable for some household uses. How to Harvest Pine Needles If you plan on composing pine mulch, keep the space under the trees free of debris and weeds. That way, when you rake and collect the needles, they will be reasonably clean. You can always hire a tree care company to do the raking and gathering for you. Pine needles gradually break down and can be used as line paths that won’t need replacing as frequently as other organic amendments. Put some of the needles as a bed bordering the tree roots to aid in nourishing your trees, hindering excessive weed growth and moisture loss. 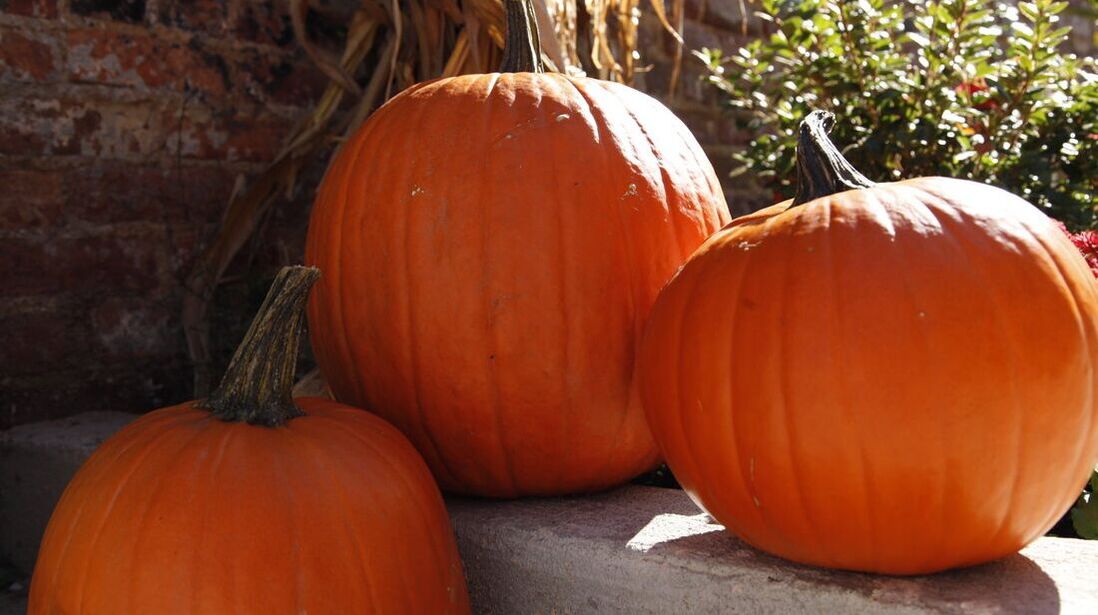 Fancy, funky, and fun! We’re not talking about your everyday pumpkins! From baby size to colossal, gold to white to aqua, pumpkins are everywhere in the fall, indicating a change in the seasons and announcing upcoming holidays. Did you know that planting pumpkins are easy and straightforward to do?
Those funky, fancy pumpkins can be costly. So, you might be wondering how to grow your own. If you have been considering growing pumpkins for future festivities, keep reading this article to learn all about planting pumpkins. Planting Pumpkins Using Seeds You’ll want to get started in late spring or early summer for them to be ready for autumn. The soil temperature will have to be around 60 degrees. Check with your local tree service company to find out the best planting time in York. Pumpkin growing requires lots of room, as the vines can grow to unbelievable lengths. So, studying the best methods for growing pumpkins is about proper garden selection as it is about pumpkin planting. You will need top-quality soil, an adequate amount of water, around six hours of full sunlight, and good drainage. Lots of people discover the best way to grow pumpkins is by regulating these factors and studying how to grow pumpkins in a pot. Purchasing a soft-sided, 30-gallon container will deliver all the water capacity and soil volume you need for success. If you use a bigger container, you can plant a few pumpkin plants and watch them flourish. Pumpkin plants possess different male and female flowers and necessitate pollination for effective pumpkin growing. One of the top methods for efficiently growing pumpkins is to put the seeds side by side. This raises the odds of female and male flowers being close enough for successful pollination. You can hand pollinate if necessary. Though, you should let Mother Nature do most of the work for you. Put in a slow-release fertilizer, have consistently moist soil, and an abundant amount of sunshine. Boom! You know how to plant pumpkins yourself. Learning the top way to grow pumpkins is easy. Picking which of the numerous varieties to plant might be the greatest challenge of all! 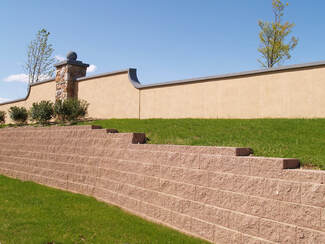 When the flourishing roots of a tree bump into concrete, it can be a shipwreck. Without meticulous planning, building a retaining wall near trees or planting a tree close to a retaining wall can spell disaster for both.
Luckily, these two can live in harmony. Below is all you must know about making this relationship work. Retaining Walls Near Tree Roots or Trees Planting and building take lots of energy and time. Before you begin, read this article to be sure you get the best outcome. While you can’t set stones or lay concrete on established roots, you can border your tree with a carefully planned enclosure. Cut the Tree Roots Before Building? Truthfully, it's advised by many certified tree care professionals that you don't. When you begin pruning, you can rob the plant of vital nutrients and water. Also, you can mess with the tree’s stability, raising the possibility of failure. Furthermore, there’s no way to ensure that the loss of roots won’t harm or even kill the tree later on down the line. If you can, construct the wall past the farthest roots in your yard. Honestly, that’s not usually possible because tree roots can grow over 20-feet past the trunk. Before trying to trim the roots, find out what you shouldn’t and should cut. You must never make cuts close to the trunk or in the drip line, the space beneath the canopy. Keep in mind that cutting roots are risky and challenging. So, if you aren’t entirely confident about what to eliminating, contact a certified arborist. Be sure to schedule a tree inspection. Can Tree Roots Damage Retaining Walls? It might seem like they are no match for concrete or durable stone, but woody roots can do real harm. Much of a tree’s growth occurs beneath the dirt. The below-ground roots that you don’t see can slip under the structure to upheave or crack it if it’s too close. Is Planting Trees Near Retaining Walls Okay? It's advised that the two are as far away from each other as possible. If you plant a new tree, find a space that’s way away from the wall as the tree will be once it’s completely grown. Yes, you can have the best of both worlds. 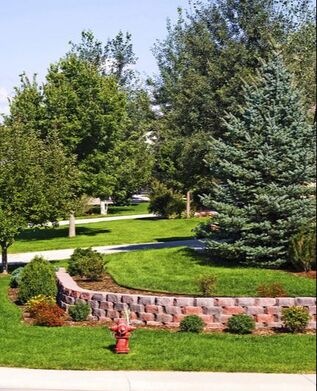 Landscapers are beginning to see an increase in the number of requests for retaining walls for residential and commercial properties. Retaining walls are sometimes necessary. You might be thinking, “What’s a retaining wall?” Well, you’ll be pleased to know that having a retaining wall in your yard is more sensible than you might think.
What Exactly is a Retaining Wall? A retaining wall is something that retains and holds the soil. It works just like a damn. It guarantees that your property ground is well-tended to and intact. However, most people don’t even notice a retaining wall. Also, retaining walls are a vital part of any landscape, adding incredible dynamics to your outdoor area. For many years, various retaining wall materials have contributed to making the world in which we live. Retaining Wall Materials Retaining walls can be built from many material types, including treated timbers, boulders, concrete blocks, rocks, or poured concrete. They can all maintain the soil. There are advantages like being simple to use and setbacks like a short life span, based on what material you pick. The first question you have to ask yourself is whether you want a geogrid reinforced wall or a gravity wall. To determine which one you want, ask yourself the questions below:
Geogrid Reinforced Wall vs. Gravity Retaining Wall Once you’ve answered the questions above, you’ll be able to choose between a geogrid reinforced wall or a gravity retaining wall. A gravity retaining wall is contingent on its weight. It's typically shorter in height. You construct this type of wall using Allan blocks, mounded together, and fastened into place. A reinforced retaining wall uses extra support to deliver extra strength. Geogrid is then put in between the various wall blocks, creating a firm soil mass. If you aren’t sure which wall will work best for your landscape, contact a professional tree contractor to test the soil in your yard to help you decide. 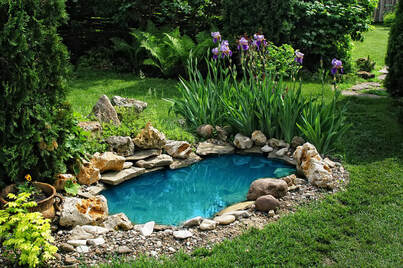 Outdoor renovations typically include adding plants, trees, and topiaries. However, in order to make your outdoor area more attractive, it is a good idea to add water features. Waterfalls & ponds are good for your landscaping.
Create a Wonderful Landscape Design One of the most popular and effective ways of enhancing your outdoor space setting is by installing waterfalls and ponds. Who could not be astonished by a fantastic pond right in the middle of a green and lush garden? From the basic to the more extravagant types, ponds come in all sizes and shapes to satisfy the different tastes and needs of property owners in York. Since additional style is provided to a garden, ponds are a huge hit. Also, waterfalls are excellent additions to a yard. The calming effect and sound of the water will make your time in your garden worthwhile. A lot of landscape designers link ponds with waterfalls to get a nature-like effect in the yard. Installing Ponds and Waterfalls The main reason why waterfalls and ponds are well-liked additions to a landscape is because of their low maintenance cost. If you have the right equipment and materials, waterfalls can become a beautiful feature in your landscape. Ponds are simple to install. Though, you still need the help of an experienced tree contractor. With their assistance, even the smallest details are handled. A professional will make sure that all the filters and pipes are hidden underground to give the pond a natural look. A garden pond must have rocks to shield the liners from the dangerous rays of the sun. Planning is a vital step in installing waterfalls and ponds. Solid Designs of Ponds and Waterfalls Even after you install a pond, there are more features available to take it to the next level. A professional can decorate your pond with slab stones, pebbles, bricks, and sculptures. There are numerous other selections to pick from. Call a landscaping specialist to discuss the many various design possibilities for your waterfall and pond. Bring your outdoor space some style and color with distinct hardscapes. 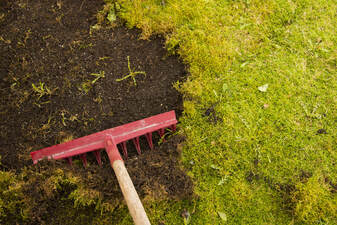 Moss is a plant that can develop in conditions that other plants, such as grass, can’t survive. It is not a very competitive or aggressive plant. Nature appears to use it more as a filler, for bare or thin soils.
So, to answer the question “Why is there moss in my lawn?” the correct and straightforward response is "because you have conditions that are making it difficult for your lawn to live.” Below is more information on dealing with moss in your yard. Myth About Moss Ask a tree specialist what can be done about moss, and he or she will let you know that the soil is low in pH and must be sweetened with some calcium (lime). This is so not true! Moss flourishes in any soil type, including alkaline, acidic, even on a rock. The only way that lime at times aids lawns in squeezing out moss is when the soil is too acidic for the grass to thrive accurately and is thinning out. With lime, in this case, it would elevate the pH level and enhance the health of the grass. So, the exact reason for the moss here is the bad health of the grass. Moss Causing Conditions Here are the real reasons for moss on lawns:
To conclude, in dealing with moss in your yard, look for the situations that may be contributing or causing it. Change what you want, and if you can’t alter the situation, take pride in the fact that this green is covering what could be naked soil. 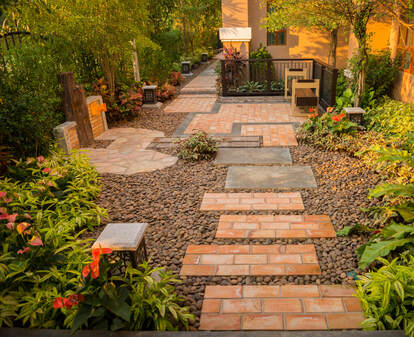 When it comes to your landscape, stones provide practicality and beauty. What things should you consider when choosing landscape stone for your outdoor space?
Aesthetic Appeal Regardless if you’re building something like a driveway, deck, or walkway, framing landscaping beds with stones draw the eyes to the natural beauty of the stones. Also, you can use stones to stop weeds as an alternative to mulches if you want a sophisticated look. Stones are available in a vast range of textures, colors, and sizes. The design choices for stones are truly impressive. Price Few folks can afford to disregard the issue of price, so it is smart to pick a type of stone that satisfies your budget. When considering the possibilities, remember that the size of the stone influences the cost needed to finish the job. When determining your expenses, make sure to include the price of the stones. Texture The texture of your stone selection should be right for the way that you want to use it. Rounded or crushed stones like river rocks are usually more comfortable underfoot, so they are a well-liked pick for heavy foot traffic areas such as patios, decks, and walkways and patios. Though rounded stones are more likely to disperse than their peers, so they may not be the best choice for sloping surfaces or borders. Temperature The temperature isn’t the first thing that comes to mind when you’re thinking about landscape stone. But, cooling and solar heating has a crucial impact on the health of your plants and your comfort. Dark colored stones retain heat. This can be wonderful on a crisp fall evening, but it could cook your plants in the summer. In contrast, light-colored stones reflect the sun’s rays, maintaining a cool space. If you are interested in use stone to improve your landscaping, it’s critical that you think about how the stone you pick will function and the influence it will have on its setting. If you want some assistance, talk with a knowledgeable tree care professional to help you make the top stone selection for your landscape project. |

© Tree Service York PA 2016-2020
Leaders Heights | Jacobus | Emigsville | Mount Wolf | Manchester| Marietta | Bainbridge | Wrightsville | Dallastown |Windsor | East Prospect |York Haven | Red Lion | Dover | Loganville | Seven Valleys
Tree Service York PA
2536 Eastern Blvd #102
York, PA 17402
(717) 216-4888
2536 Eastern Blvd #102
York, PA 17402
(717) 216-4888