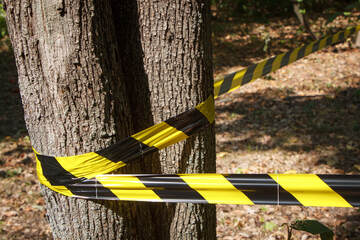
 Construction zones can be hazardous places, for humans and trees. Trees can’t protect themselves with hard hats. Therefore, it’s up to us (humans) to ensure nothing happens to damage a tree’s health in work zones. Read on for tips for protecting trees in work zones.
Tree Protection during Construction Did you construct your house near mature trees to benefit from their visual appeal and beauty? You aren’t alone. Several trees take years to create attractive canopies and strong deep roots they achieve at maturity. Sadly, the trees you want near your residence are at risk during construction. Stopping tree damage in work zones is an issue of planning cautiously and partnering with your tree contractor. Preventing Tree Damage in Work Zones Trees are at risk when construction work is happening around them. They can get several different injury types. Use these tips to aid in preventing tree damage. Branches and Trunks The machinery used during construction can harm a tree’s branches and trunk. It can snap branches, create wounds in the trunk, slice into the bark, letting in diseases and pests. You could and should stress to the contractor that you want your trees protected during construction. Also, you’ll want to take action to guarantee this instruction. One way is to install a durable fence around each tree. Put it as far away from the trunk as you can. Keep all construction equipment out and tell the construction workers to remain outside the fenced area. Tree Roots Also, tree roots are at risk when work includes grading and digging. Roots can spread out over twice as many feet as the tree is high. When construction workers damage a tree’s roots near the trunk, it can destroy the tree. Additionally, it limits the tree’s capability to remain upright in storms and winds. Tell your crew and contractor that the fenced area is out of bounds for trenching, digging, or anything else that will disturb the soil. Soil Compaction Trees need porous soil for excellent root development. Preferably, the soil will have over 45% pore space for irrigation and air. When hefty construction machinery goes over a tree’s root space, it compacts soil severely. 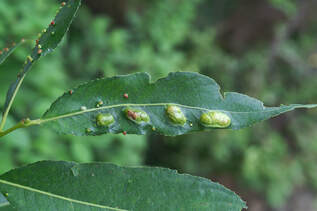 Many species of phylloxera are pecan pests, but just the pecan phylloxera creates financial damage in a specific period. The southern pecan leaf phylloxera as well as the pecan leaf phylloxera feed mainly on the foliage. The pecan phylloxera infects the foliage, fruit, and shoots and therefore is the most destructive.
The pecan phylloxera is an aphid-looking, little insect that is never seen. Though, the galls it develops are noticeable and prominent. Serious infestations create weak, malformed shoots that ultimately die. The pecan phylloxera hibernates as eggs in the dead body of an adult female, which is in protected parts on pecan tree branches. Right after budbreak, the eggs hatch and the little insects travel to leaf tissue or opened buds to feed on increasing new growth. Stem mothers are the ones that come from the hibernating eggs. Eating by the stem mothers encourages the growth of galls, which surround the stem mother in a couple of days. In the gall, the stem mother grows old, lays her eggs and perishes. The stem mothers’ laid eggs emerge within the gall, and these pests feed in the gall until they become old. Description The nymphs and adults are 1/8 inch, little, the color of cream, and has soft skin. They look like aphids minus the cornicles. You'll want a hand lens to see and detect them. Control Because the galls are easily seen, pecan phylloxera plagues typically look worse than they are. Only when galls appear on vast numbers of nuts or shoots should you think about using insecticides. Time management of your pest control applications is crucial, and you must aim insecticide applications in the direction of the stem mothers. Apply budbreak sprays to the new growth. When the galls appear, it is too late to manage pecan phylloxera. Typically, only the trees that were affected the previous year will require treatment, not the whole orchard. Certain grafted varieties and native trees within an orchard get more seriously infested than other plants. Getting tree removal service or spraying can stop monetary infestations from expanding all over the whole orchard. 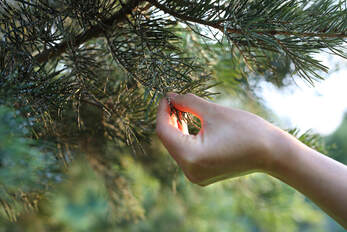 Checking needles frequently is important Checking needles frequently is important The pine needle scale is the most well-known armored scale found on conifers in North America. The white, oyster shell-shaped scales can cover needles, creating plant discoloration to needle and limb death. These pests like pines, particularly mugho and Scotch. However, it can infest other firs, Douglas-fir, pines, and spruces.
How Pine Needle Scale Damage Trees Substantial infestations of pine needle scales eliminate significant amounts of plant juices resulting in discolored needles. From a distance, trees look silvery or frosted. If any outbreaks continue, limbs and twigs could die and will need to be trimmed out. Life Cycle and Description This scale stays on the needles of its host and develops shell-shaped, white wax covers. These covers are around 1/8 of an inch when the scales are completely grown. There is a yellowish spot, the exuvim, on the little end. The male scales are typically slender and smaller. This scale overwinters as deep-red colored eggs are safe under the female's old armor. The eggs hatch in the spring into flat, tiny nymphs known as crawlers. These crawlers go to new places on the tree to find the right needles on which to feed. These clumsy crawlers usually drop from the trees and could be blown onto trees close by. Once on an appropriate needle, the crawler attaches its mouth and starts to develop new armor. After a couple of weeks, the nymph sheds under the armor and continues to grow in size for about 21 days. Control Hints This scale usually is spread by crawlers going from tree to tree. Spread is also swifter when mature trees start to touch branches. Also, scale crawlers could spread with animals or birds which brush or roost against trees with active crawlers. Early discovery will stop the spread and lessen the need for extensive spraying. Using horticultural oil sprays along with insecticides or insecticidal soaps are even more effective. The pine needle scales are usually killed by the pesticides used for other insect pests. Close monitoring of the parasites and using a pesticide can be successful. It is best to get a professional tree care expert to do the work.  Wood shelf made out of a pallet Wood shelf made out of a pallet Enrich the Look of Your Deck or Patio with Custom-Crafted Wood Furniture
When you think of outdoor furniture, you may envision a glass-topped patio table, plastic chairs, and resin chaise lounges. Admittedly, this is a comfortable patio set up for family and friends. Want something different? Wooden outdoor furniture can make your patio or deck look amazing. Also, you can construct pieces of wooden outdoor furniture with leftover wood found around your property. This is a great way to make creative use of old wood that you would usually throw away. If you don’t have any leftover wood but would like to build some wood furniture items, call your local tree care company for some. Take a look at some ideas for leftover wood! A Pallet Table Do you have any empty pallets in your garage or storage shed? If you do, you have the needed materials for an outdoor coffee table. This table can be constructed with two pallets of any size. The building involves putting two pallets together with small wood blocks of wood and using sealant on the table to shield it from moisture. Be sure the pallet on the top has an even surface that will hold plates and cups. You can either put your pallet table on the ground or fasten casters to it so you can quickly move it around the patio or deck. A Table Thanks to Wood Wine Crates Also, wood wine crates can be used to make a table. If you have a cozy backyard area, you might choose to create a table with two little wine crates. On the other hand, if you desire a full-size table, you can use four big wine crates. Regardless if you build a big or small table, you will need to apply a coat of sealant on the wood to safeguard it from the rain. Leave the illustrations and names of the winemakers to bring a little more intrigue to your creation. Lastly, all your wooden furniture pieces must be kept clean, so they stay in top condition. Use a mixture of warm water and mild soap to eliminate dirt. Then, put your items out in the sun so they can completely dry.  When you see a healthy tree, you realize that its roots are getting lots of nutrients, water, and oxygen. Do you know that a tree's root system can grow well beyond the length of its limbs? Sadly, over time, a tree's roots can invade sewer pipes, your home's foundation, or even the sidewalk. Read on for some facts about what you can do when tree roots become invasive.
What Can Invasive Tree Roots Do? A tree's roots can get into a sewer pipe via a broken or cracked section. When roots enter a sewer pipe, they can create more damage to a pipe as well as some blockage. Another scenario of invasive tree roots is getting under a section of sidewalk and lift the cement. This makes the sidewalk lopsided and a hazard for bicyclists and pedestrians. Tree roots have been known to grow under fences, moving them upward. Causes of Invasive Tree Roots The reason why tree roots get into sewer pipes is moisture. When a sewer pipe is leaking and dented, the tree roots naturally grow in the direction of the moisture. Ultimately, the roots get inside the pipe. Poor planning is another reason why folks are met with invasive tree roots. They plant trees too close to pipes, sidewalks, and their house. Solutions for Invasive Tree Roots If you have invasive tree roots, you have some choices besides cutting down your tree. One alternative is a hydro-jetter. This tool kills the tree roots in a pipe with a vast amount of water and spinning wires going down the pipe. Though it can be pricey, a hydro-jetter is effective at eliminating the problem. A second solution is to dig up the invasive tree roots and fix the damaged sewer pipe. Also, some chemicals can be applied to the tree roots to destroy them. We recommend calling a Tampa tree care company when it comes to using tree chemicals. How to Stop Invasive Tree Roots One thing you can do not to have invasive tree roots is to pay attention to the tree types you plant in your yard. Some trees have fast growing root systems, while others do not. 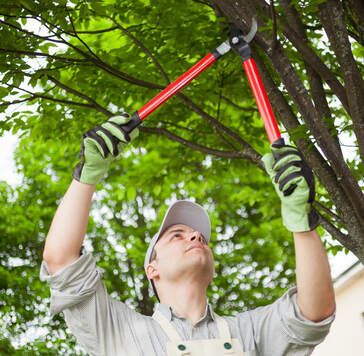 Tree thinning is the removal of live branches at the outer canopy that is duplicating or crossing. This is done to improve air movement and light penetration. It also lessens the weight of heavy limbs.
Older trees must have no more than 1/3 of live foliage eliminated when thinned. Thinning tree canopies for the health of the tree is also good for the health of the surrounding shrubs, lawn, and trees. The splendor of a healthy tree can’t be devalued. Trees provide shade to the garden, offer wildlife habitat and create a natural barrier against nosy people. Though, the pretty little tree you planted years ago can flourish to become a beast, shadowing all other life below and making a moonscape of patchy sod and leggy plants. To improve your tree’s health and for the well-being of lower story plants, you have to sometimes thin the canopy to let in air and light. You don’t have to be an arborist to know how to thin out a tree’s canopy, but some tips are helpful. Canopy Thinning The reasons for thinning tree canopies go way pass enhancing air and light. Also, the method is useful to keep a tree in a specific growth habit, stopping limbs from getting invasive or the tree from getting too tall. Whatever the reason, canopy thinning is a discerning pruning technique that must be done when the tree is dormant. The objective with tree thinning is to lessen the thickness and number of tree branches in the crown. Crown thinning trees let more light get to the core of the limbs to improve the growth of stems and leaves and stems. More air circulates, reducing pest and fungal issues. Thinning the crown diminishes the weight to strengthen and stabilize the tree. Heavy thinning is discouraged, as it can incite the formation of unwanted growth, like water spouts. Light thinning encourages new leaf or needle growth, which give better health and increases photosynthesis. Crown Thinning to Brighten Shade Gardens The light pruning needed to open up the canopy and take in more light is mostly done on the tree’s exterior. This is where substantial growth has encouraged limbs to branch out and shaded lower plants.  Bark is the external covering of a tree’s branches and trunks. Bark is like a human’s skin. Its purpose is to protect the tree’s vital systems from bad weather as well as pests, animals, and diseases.
Certain tree types have real thick bark that safeguards the tree from brush fires. Additionally, bark transports water and food all over the tree. Serious bark damage can kill the tree. The bark of a tree is like our skin. Besides being necessary for the existence of the tree, a vast array of other types take advantage of their place in the ecosystem. Tree bark is essential in protecting your tree, from drying by wind or burning from the sun. It also helps to keep away mammals and insects that try to take advantage of the wood or sap. Environmental adaptations The bark of various trees has grown to make the best use of the place in which every species resides. Many trees have chemicals in their bark, which shields against pest and fungal attack. Birch bark has volatile oils and is waterproof and resistant to decay. Tubes of birch bark can be found on the forest floor after the wood inside has rotted. The bark of oak is quite high in tannins which are toxic and safeguards the tree from insects. Aspen bark has some fantastic features. On many trees, it is a visible greenish-grey color, and it is the result of the tree is one of the few that can photosynthesize in its bark. Also, it has diamond-shaped marks on the bark that are little breathing holes termed lenticels. Other species Various species of trees have different textures on their bark that affect what other types live on it. The deep crevices and fissures on the bark of a Scots pine or an old oak are a haven for several species of spiders and insects. These invertebrates entice birds which feed on them. The crested tit is very much a pinewood bird that diet includes twigs in the branches and bugs from the bark. If you believe your tree has a bug infestation, call a tree specialist and schedule a tree inspection. 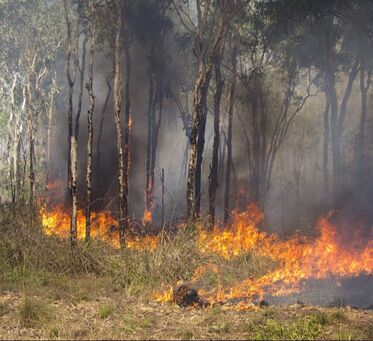 If your landscape has trees with fire damage, you might be able to save a number of your trees. You’ll want to begin aiding your fire damaged trees as swiftly as possible, once you get rid of the ones that could fall on other properties or people. Check out this article about fire damage trees and how to repair them.
Fire Damage to Trees Fire can destroy and even kill trees in your outdoor space. The extent of the damage is contingent on how hot and how long the fire burned. Also, it depends on the tree type, how close the trees were, and the season the fire happened. An out-of-control fire can harm trees in your yard in several ways. It can partially or consume them, dry them out and burn them, or sear them. With your assistance, trees damaged by fire can recoup. This is somewhat true if the trees were dormant when they were harmed. But the first thing to do, even before you begin helping your fire-damaged trees, is to decide the ones that have to be eliminated. An arborist will be able to evaluate your trees and provide recommendations. Repairing Burnt Trees A fire burns out trees and the roots. When you are aiding, you have to keep the soil moist under the trees during the growing phase. Water-absorbing tree roots are situated around the top of the soil. Plan on soaking the whole area under the tree, keeping the water at around 15 inches. To achieve this, you’ll have to give water slowly. You can place the hose on the dirt and let it run slowly, or else buy a soaker hose. Dig deep to make sure the water is going into the soil where the tree requires it. You’ll also want to shield your wounded trees from sunburn. It was the canopy’s job to do that. Until it comes back, wrap the significant limbs and trunks in cardboard, tree wrap, or cloth. You can also apply a water-based white paint. In the springtime, you can tell which limbs are live and which are not by the growth or lack of it. The next thing you must do is trim off the dead limbs or make arrangements to have your trees trimmed. If you don’t have any pruning experience, get in touch with a local tree contractor. 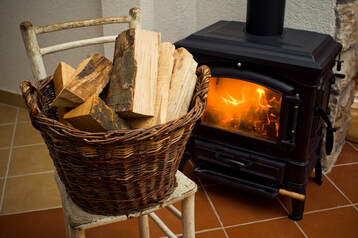 When selecting wood for your wood stove, you have plenty of choices. There are two main factors you should take into consideration when picking the best logs for your wood burning stove: wood moisture content and wood type. This is why it is crucial to know the best and worst wood for a wood burning stove.
Why does what type of wood I burn matter? Picking firewood wood is more complicated than you think. What you burn is vital to your wood burning stove’s longevity and performance. It doesn’t matter if you harvest your wood or use a delivery service, you have to know about wood types. Wood types affect how well your stove does in many areas. Oak One of the most conventional tree types is oak. Even though they aren’t the tallest trees, they can still get quite big if well maintained. Oak is a thick hardwood tree so that it will burn for quite a long time. Maple Maple is a hardwood tree that has exceptional heating values. It can be a hard tree to split into convenient size logs. But once it’s done, it creates useful, hot-burning wood. Like oak, it can be hard to get a fire going using maple. It may necessitate kindle from a softer wood to begin the process. But once it’s started and going right, maple delivers long-lasting burning and warmth. Also, maple produces very little smoke, which is a plus when burning a fire in your house. Cherry As a fruit tree, this hardwood also creates very little smoke. And when it burns, it makes a pleasant aroma. Though, it doesn’t burn as hot as maple or oak. It burns at a medium heat, which is excellent on milder evenings when you want a fire more for ambiance instead of warmth. Elm Elm trees offer a suitable heat source, but it is well-known for being hard to split. Because of Dutch elm disease, it is also normal to see dead elm trees throughout certain neighborhoods. However, when removing these trees, it is conceivable to use them as firewood since the wood is quite dry. Contact a York tree specialist for more information on the best and worst firewood for your home. 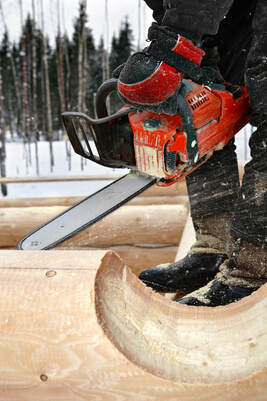 This huge choice of log cabin notches can create confusion about which notch to use. Picking the right corner, including scribe and notch type, for your log cabin is crucial as it will affect pricing, weatherproofing, and visual appeal.
If you’ve not already read about the various log cabin construction techniques, begin by reading this article on using a saddle notch to build a wood structure. Why are notches critical If you are new to constructing a log home, then scribing is a method used to make a notch. When you build your log cabin, where every log wall connects, a notch is scribed to help with the wall locking process. Notches are best when joining the corners of your log cabin. Usually, every notch is scribed by hand or using a template/jog, to make an air-tight seal stopping air infiltration and weatherproofing your cabin. If you’re thinking about building a log cabin, you’ll have to know how to scribe logs. Mostly, you’ll do scribing for saddle notches which are used to join two logs perpendicularly (cabin corners). How to scribe a saddle notch You can scribe with a carpenter’s compass. It has all the necessary parts, including a point for scribing. Once you have the preferred depth of the notch, put your compass at that distance. Put the log to be scribed precisely where you want it. If one end of the log won’t be scribed, even it out with blocks to the height of your compass. Drive a screw to keep the log in place while you scribe. Next, holding the compass still, follow the outline of the bottom log and scribe the top log. Go to the other side and repeat. Before you move the log, scribe the other end if you have one more notch to cut there. Once you’ve created all your scribing marks, release the log and turn it over. Gently unite the scribe marks on every side, so you see where to start your cut. Create straight cuts each half inch to the deepness of the scribe marks. Turn the log over and fit it into place. Practice before you begin working on your log cabin. It takes a while to get the just of cutting and scribing. If you want professional help, contact a York arborist. |

© Tree Service York PA 2016-2020
Leaders Heights | Jacobus | Emigsville | Mount Wolf | Manchester| Marietta | Bainbridge | Wrightsville | Dallastown |Windsor | East Prospect |York Haven | Red Lion | Dover | Loganville | Seven Valleys
Tree Service York PA
2536 Eastern Blvd #102
York, PA 17402
(717) 216-4888
2536 Eastern Blvd #102
York, PA 17402
(717) 216-4888